Introduction
Publishing your first website on the internet may seem like a daunting task, but with the right guidance, it is a manageable process even for beginners, here's how to upload my website to the internet with a quick and easy guide.
Complete Guide to Upload Your Web Page to the Internet
Table of Contents
Step 1 - Choose a Hosting Provider
What is a Hosting Provider?
A hosting provider is a company that offers the services and technologies necessary to make your website visible on the Internet. Popular examples include our own service, ClickPanda.
Factors to Consider When Choosing a Supplier
Step 2 - Register a Domain
What is a Domain?
A domain is the unique address of your web site on the internet, such as www.tusitio.com. It is what users type in the browser to access your site.
visit our blog: Complete guide to create a private server in 2025
How to Register a Domain
- Select a Domain Name: Choose a name that is easy to remember and relevant to your site.
- Check Availability: Use domain search tools to make sure the name is available.
- Purchase the Domain: Complete the purchase through your hosting provider or a domain registrar such as ClickPanda.
Step 3 - Set Up Your Hosting Account
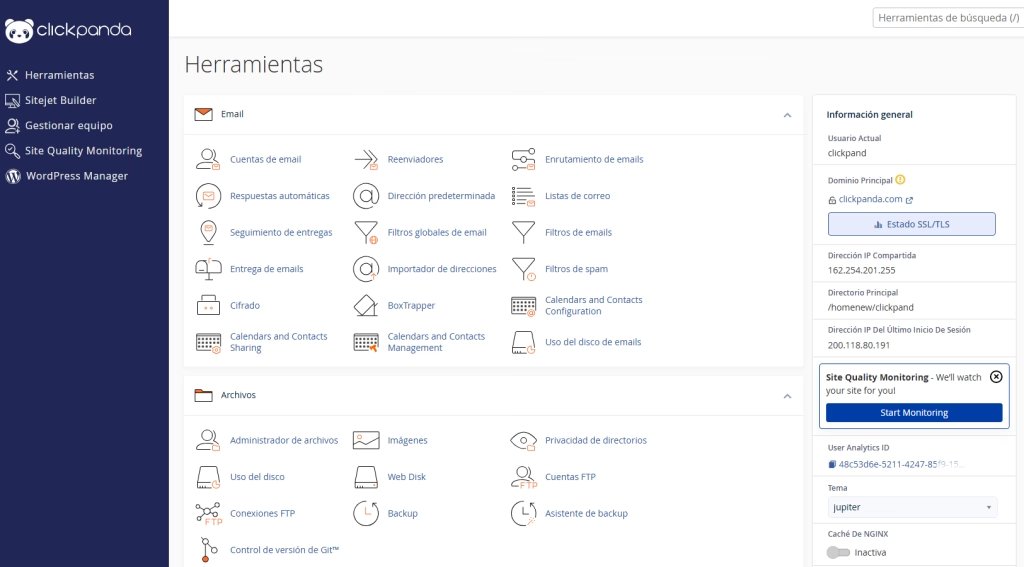
Accessing the Control Panel (cPanel)
Most hosting providers offer a control panel called cPanel, which makes it easy to manage your website. This is where you will set up your domain, upload files and manage databases.
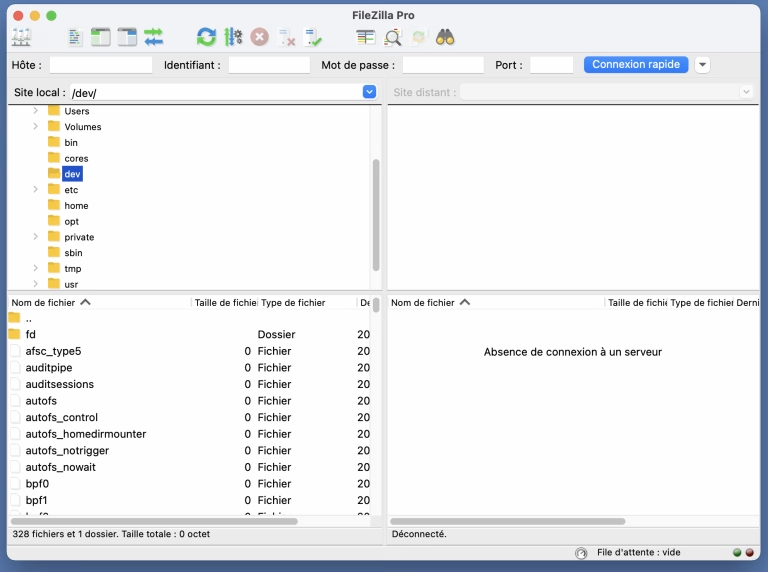
Create an FTP Account
FTP (File Transfer Protocol) allows you to upload files from your computer to the hosting server. Set up an FTP account in cPanel and use an FTP client such as FileZilla to connect and transfer files.

Step 4 - Upload Your Website Files
Using cPanel File Manager
The cPanel file manager is an easy-to-use tool that allows you to upload files directly to your server without the need for an FTP client.
Upload Files via FTP
If you prefer to use FTP, open your FTP client, connect to the server using the provided credentials and upload your website files to the public directory (public_html).
Step 5 - Configure and Verify Your Site Online
DNS configuration
After uploading the files, you need to configure the DNS records to point your domain to your hosting server. This is done in the control panel of your domain registrar.
Site Verification
Once the DNS changes propagate (this can take up to 48 hours), your website will be online. Verify by visiting your domain in a browser.
Step 6 - Safety and Maintenance
Install an SSL Certificate
An SSL certificate ensures that the connection between your website and its visitors is secure. Consider installing an SSL certificate, like the ones we offer at Click Panda, to protect your users' information.
Upgrades and Backups
To finish how to upload my website to the internet you should keep your website up to date and make regular backups to protect it from possible failures or attacks.
Conclusion
Publishing your website on the internet is a process that may seem complicated at first, but by following these steps, you can have your site up and running in no time. If you have any questions or need assistance, don't hesitate to contact our support team at Click Panda. Good luck with your new website!